The interface design can be customized using skins for a different look. Click to view the relevant information.
Basic Info Window
Basic Info Window (Alt+V)
Displays the character's name, class, level, HP, SP, experience, and other information, and includes buttons at the bottom to call up other mini windows.
The basic info window can be resized using a shortcut key.
Shortcut Window
Shortcut Window (F12)
You can register skills or items here for easy use via keyboard.
status
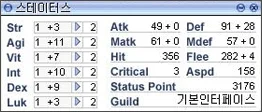
◈ Status
| Str | +3 | 1 | Atk | 49 + 0 |
| Agi | +3 | 2 | Matk | 61 + 0 |
| Vit | +3 | 1 | Hit | 356 |
| Int | +3 | 2 | Critical | 3 |
| Dex | +3 | 2 | Status Point | 3176 |
| Luk | +3 | 2 | Guild | Basic Interface |
| Def | 91 + 28 |
| Mdef | 57 + 0 |
| Flee | 282 + 3 |
| Aspd | 158 |
This window, included with the Equipment window, allows you to check the character's status and corresponding stats.
Points earned upon leveling up can be distributed to each stat in this window.
equip
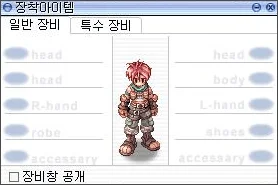
Equipped Items
General Equipment | Special Equipment
Head
Head
R-hand | Body | L-hand
Accessory | Robe | Shoes
Accessory
Equipment Window Revealed Equipment Window (Alt + Q)
You can check the equipment items your character currently has equipped.
Each item can be equipped/unequipped by double-clicking or via drag & drop, and you can reveal your equipment to other users through the "Show Equipment" option at the bottom right.
skill
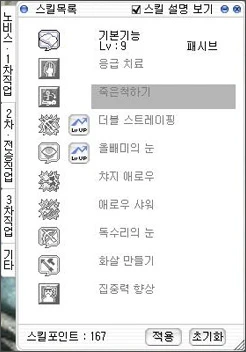
Skill List
View Skill Description
Basic Info
1st Job
2nd Job
Job Change Quest
3rd Job
Other
 Basic Skill
Lv: 9
Passive
 First Aid
Death's Escape
 Double Strafe
 Owl's Eye
 Arrow Repel
 Arrow Shower
 Vulture's Eye
 Arrow Crafting
 Improve Concentration
Skill Points: 167
Apply
Reset Skill Window (Alt + S)
Shows the skills for each class.
You can invest skill points earned upon job leveling up into the skills you want.
Basic information and level details for a skill can be viewed by right-clicking on each skill icon.
item
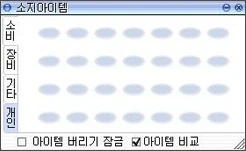
Inventory Items
Consumable
Equipment
Etc.
Personal
□ Lock Item Discard ☑ Compare Items Inventory Window (Alt + E)
This window shows the items you currently possess, and you can check your item inventory by category in the Consumable / Equipment / Etc / Personal tabs.
For consumable and equipment items, you can use or equip them by double-clicking, and right-clicking an item will show detailed information about it.
Also, you can equip/unequip items via drag & drop, or drop items onto the ground.
booking
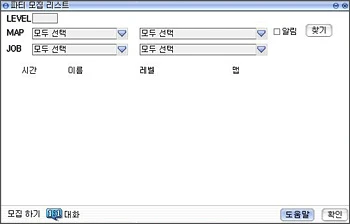
Party Recruitment List
LEVEL [ ]
MAP Select All | Select All □Notify Search
JOB Select All | Select All
Time Name Level Leveling
Recruit (Macro Chat)
Help Confirm Party Recruitment List
Automatically recruits party members.
This feature lets you recruit a party to hunt together by setting level and region criteria, etc.
party
Party Window (Alt + Z)
You can check information about the formed party.
You can create a party by entering "/organize [party name]" in the chat window.
A party can have up to 12 members, and a name already in use by another party cannot be duplicated.
guild
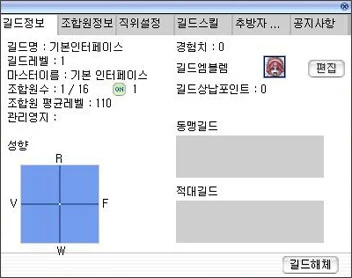
Guild Info | Member Info | Position Settings | Guild Skills | Expelled Members... | Notice
Guild Name: Basic Interface
Guild Level: 1
Master Name: Basic Interface
Member Count: 1 / 16 ON 1
Member Average Level: 110
Management Number:
Experience: 0
Guild Emblem [Edit]
Guild Contribution Points: 0
Alignment
R
F
W
Allied Guilds
Hostile Guilds
Disband Guild Guild (Alt + G)
Shows information about the guild you belong to.
You can view details such as guild level, guild experience, and guild member information.
battle
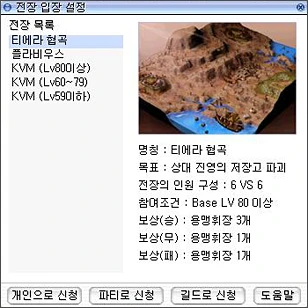
⊙ Battlefield Entry Settings
Battlefield List
Tierra Gorge
Flavius
KVM (Lv800 and above)
KVM (Lv60~79)
KVM (Lv590 and below)
Name: Tierra Gorge
Objective: Destroy the enemy faction's storage
Battlefield Composition: 6 VS 6
Entry Requirement: Base LV 80 or higher
Reward (Win): 3  Valor Badges
Reward (Draw): 1 Valor Badge
Reward (Loss): 2 Valor Badges
[Apply Solo] [Apply as Party] [Apply as Guild] [Help] Battlefield Entry Settings
This menu allows you to enter a battlefield.
You can select one of Tierra Gorge, Flavius, or KVM to enter.
quest
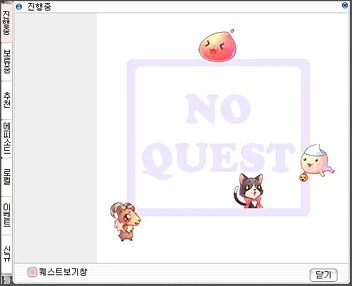
In Progress
NO QUEST
Quest View Window
Close
(Left vertical tabs: Request, Completed, Party (Formation), Recommended, Dailies, Ranking, Event, New) Quest List Window (Alt+U)
You can view information about quests your character is currently undertaking, pending quests, and other quest information.
Clicking a quest title in the quest list window displays detailed content, and checking the "Quest View Window" at the bottom left allows you to see the progress description and various conditions of the quest you are currently performing on screen.
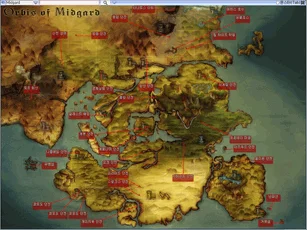
map
Full Map (Ctrl + `)
You can view the full map, including the locations of various dungeons.
Pressing the Tab button also displays detailed information such as major monsters and recommended levels, and a navigation feature is also provided.
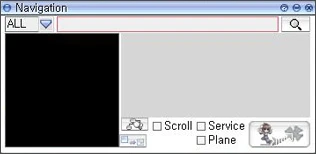
Navigation
Navigation
ALL
Scroll
Service
Plane Navigation
This is the in-game navigation-related menu.
It provides a pathfinding feature to help you find monsters and NPCs in the game.
option
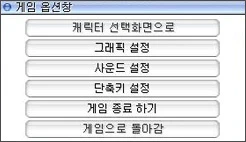
Game Option Window
Return to Character Selection Screen
Graphics Settings
Sound Settings
Hotkey Settings
Exit Game
Return to Game Game Options Window (ESC)
Used to bring up various game settings windows, move to the character selection screen, or exit the game.
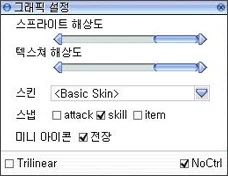
Graphics Settings
Sprite Resolution
Texture Resolution
Skin <Basic Skin>
Snap □attack ☑skill □item
Mini Icon □Battlefield
□ Trilinear □ NoCtrl Graphics Settings
This menu is used to set the game's resolution and skin.
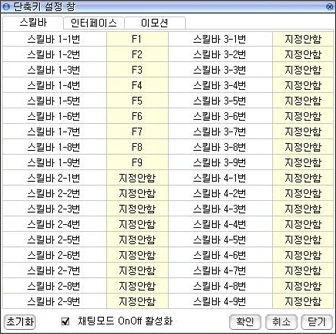
Hotkey Settings Window
Skill Bar | Interface | Emotion
Skill Bar 1-1 | F1 | Skill Bar 3-1 | Not Set
Skill Bar 1-2 | F2 | Skill Bar 3-2 | Not Set
Skill Bar 1-3 | F3 | Skill Bar 3-3 | Not Set
Skill Bar 1-4 | F4 | Skill Bar 3-4 | Not Set
Skill Bar 1-5 | F5 | Skill Bar 3-5 | Not Set
Skill Bar 1-6 | F6 | Skill Bar 3-6 | Not Set
Skill Bar 1-7 | F7 | Skill Bar 3-7 | Not Set
Skill Bar 1-8 | F8 | Skill Bar 3-8 | Not Set
Skill Bar 1-9 | F9 | Skill Bar 3-9 | Not Set
Skill Bar 2-1 | Not Set | Skill Bar 4-1 | Not Set
Skill Bar 2-2 | Not Set | Skill Bar 4-2 | Not Set
Skill Bar 2-3 | Not Set | Skill Bar 4-3 | Not Set
Skill Bar 2-4 | Not Set | Skill Bar 4-4 | Not Set
Skill Bar 2-5 | Not Set | Skill Bar 4-5 | Not Set
Skill Bar 2-6 | Not Set | Skill Bar 4-6 | Not Set
Skill Bar 2-7 | Not Set | Skill Bar 4-7 | Not Set
Skill Bar 2-8 | Not Set | Skill Bar 4-8 | Not Set
Skill Bar 2-9 | Not Set | Skill Bar 4-9 | Not Set
Reset ☑ Enable Chat Mode On/Off OK Cancel Close Shortcut Settings
This menu allows you to directly set shortcuts for the skill bar, interface, emotions, etc.
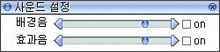
Sound Settings
Background Music ◀ on ▶
Sound Effects ◀ on ▶ Sound Settings
This menu is used to configure in-game sound.
You can adjust the volume of background music and sound effects.
Bank
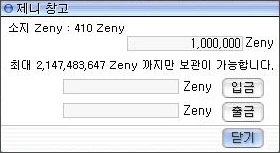
Zeny Storage
Zeny Held: 410 Zeny
1,000,000 Zeny
You can only store up to a maximum of 2,147,483,647 Zeny.
Deposit Zeny
Withdraw Zeny
Close Zeny Bank (Ctrl + B)
You can deposit/withdraw the Zeny you hold.
Since Zeny in Ragnarok is stored per character, please use the [Zeny Bank] if you wish to move Zeny to another character on your account.
rec

00:00:00 Replay Recording Menu
You can record your in-game play screen.
Recorded footage can be viewed via the [Replay] feature in the website's starter pop-up.
Ragnarok Pre-registration
- Pre-registration Information
- Participation Information
- Download
- News
- FAQ
Go watch the replay!
Everlasting
PROJECT
More than ten years of records made by Ragnarok
PART 1. World Cup's Imagination
[Number and character image] Character 'Fighter'
[Character image] High Level
GAME START
ⓒGRAVITY 2013 GRAVITY CO.,LTD. ALL RIGHTS RESERVED.
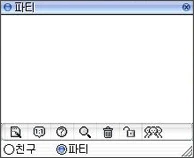
Friends Window
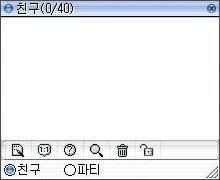
Friend (0/40)
●Friend ○Party Friends Window (Alt + H)
You can check your friends list and their online status.
It exists within the same frame as the Party window, and can be accessed using the shortcut key or by clicking the "Friends" button at the bottom of the Party window.
You can send notes or have 1:1 conversations.
Create Chat Room Window (Alt + C)
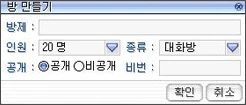
Create Room
Room Name:
Max Members: 20 people Type: Chat Room
Visibility: ⦿Public ○Private Password:
[Confirm] [Cancel] Create Chat Room Window (Alt + C)
You can open a chat room to converse with other users.
A chat room can hold up to 20 people, and you can set a password when creating the room to restrict entry.
Shortcut List Window
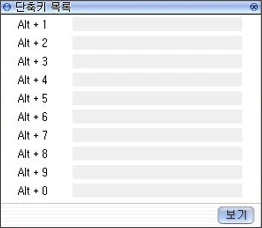
Shortcut Key List
Alt + 1
Alt + 2
Alt + 3
Alt + 4
Alt + 5
Alt + 6
Alt + 7
Alt + 8
Alt + 9
Alt + 0
View Shortcut List Window (Alt + M)
Through macro settings, you can easily use emoticons or commands.
After entering the desired content in each slot, pressing Alt + a number key will output the entered content, and the content of each slot can be changed at any time.
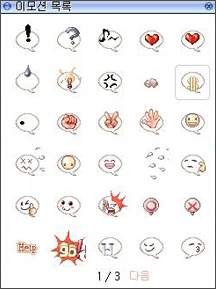
Emotion List
Emotion List
Help
1 / 3 Next Emotion List (Alt + L)
You can set various in-game emotions.
These are mainly used by registering them in the [Shortcut List].
Minimap
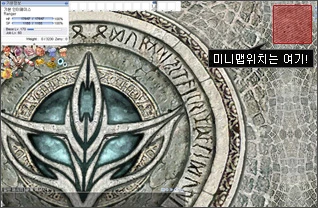
The minimap location is here! Minimap (Ctrl + Tab)
You can check your character's current location via the minimap that appears in the upper right of the screen.
You can zoom the map in/out using the +/- buttons, and use the magnifier button to choose whether major facilities are displayed.
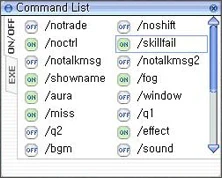
Command List
Command List
ON/OFF | | |
OFF /notrade | OFF /noshift
OFF /noctrl | OFF /skillfail
OFF /notalkmsg | OFF /notalkmsg2
OFF /showname | OFF /log
OFF /aura | OFF /window
OFF /miss | OFF /q1
OFF /q2 | OFF /effect
OFF /bgm | OFF /sound
EXE Command List (Alt + Y)
This sets various in-game shortcuts.
In-game shortcuts can be set to on/off.
Chat Window
Chat Window (Alt + F10)
This window is used for conversation; pressing Enter opens or closes the white chat input field at the bottom.
After opening the chat field and typing your message, pressing Enter will output it as a public message.
It is divided into chat window sections; entering another character's name in the left field and typing what you want to say in the right field allows you to send a 1:1 whisper.
※ Website information may change somewhat depending on game updates.